Removing Chair Rail - The Misused Confused Chair Rail Thisiscarpentry : Historically, chair rails were used to protect plaster when chairs were backed up against the walls to clear space in the middle of a room.. Then using a sturdy putty knife get in behind the chair rail, and then using a screwdriver or, anything else to pry it off, put the screwdriver on the putty knife using that as a block. You will also most likely have other things that need patching as well. A chair rail, also known as a dado rail, is a horizontal piece of trim that usually runs the perimeter of a room approx 36″ from the floor, but can also be awkwardly placed on a single wall (popular in the '90s). Need info on how to remove chair from track assy. 1 cut through the caulk by running the edge of the pry bar.
If it is removed with care, chair rail can be reused. Consider complete panelling below the chair rail: As mentioned earlier, the nails that did not come out with the chair rail when you pried it off can be removed by using a hammer or pliers. When you are done, you will have the nail holes to patch. Bruno stair chair model 1550.
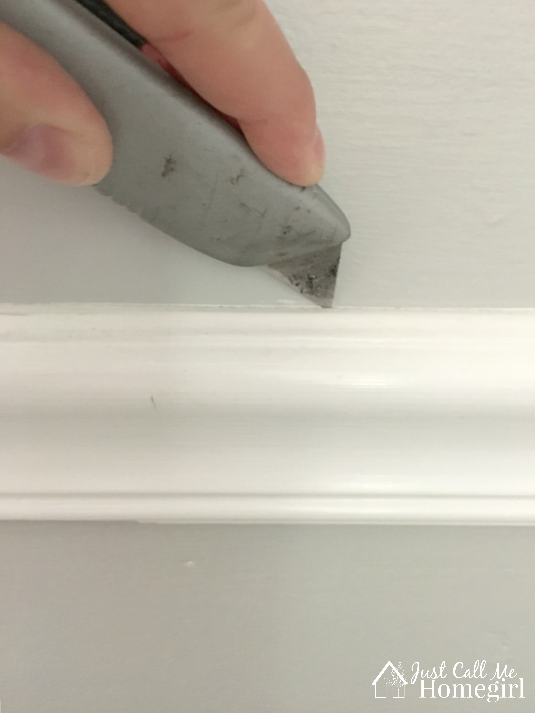
How To Remove A Chair Rail Just Call Me Homegirl from justcallmehomegirl.com If it is removed with care, chair rail can be reused. Use a utility knife to score along the edges of the trim. The chair rail is weak. A straight rail is typically bolted into every 3 to 4 stairs and a curved rail into every other stair. If you don't like that look, i would recommend removing the chair rail. Luckily, i discovered that the original installer never. If you don't like that look, i would recommend removing the chair rail. 1 cut through the caulk by running the edge of the pry bar.
Let me show you a side by side comparison of the first attempt in our living room to this attempt.
Work on a small section of wood trim at a time and allow the vinegar to work for 15 minutes before continuing. At this point, leave the rails attached to the chair frame, because it is easier to insert your new sling into a rail that is held firmly in place. On most units the chair needs to be removed from the top of the rail and then carried down the stairs. The chair itself is bulky and has significant weight, so be careful. Slide the thin edge of the pry bar into the gap, using the putty knife as a shield to protect the wall. Fill a small spray bottle with distilled white vinegar and spray the vinegar into the opened seam to loosen the wood glue. After cutting along the trim, insert the pry bar's edge into the wood trim. A chair rail, also known as a dado rail, is a horizontal piece of trim that usually runs the perimeter of a room approx 36″ from the floor, but can also be awkwardly placed on a single wall (popular in the '90s). The dip in the middle does not matter (nor do the nail holes) as the joint compound will take care of that, it's all about making the surface uniformly flat. No structural modifications are needed. It comes as a dry mix in a bag, in 5, 20, 45, 90 minute varieties, and you mix up only what you need to use. It became common to use the rail as a divider strip for paint or wallpaper to create a contrasting look. The chair rail is weak.
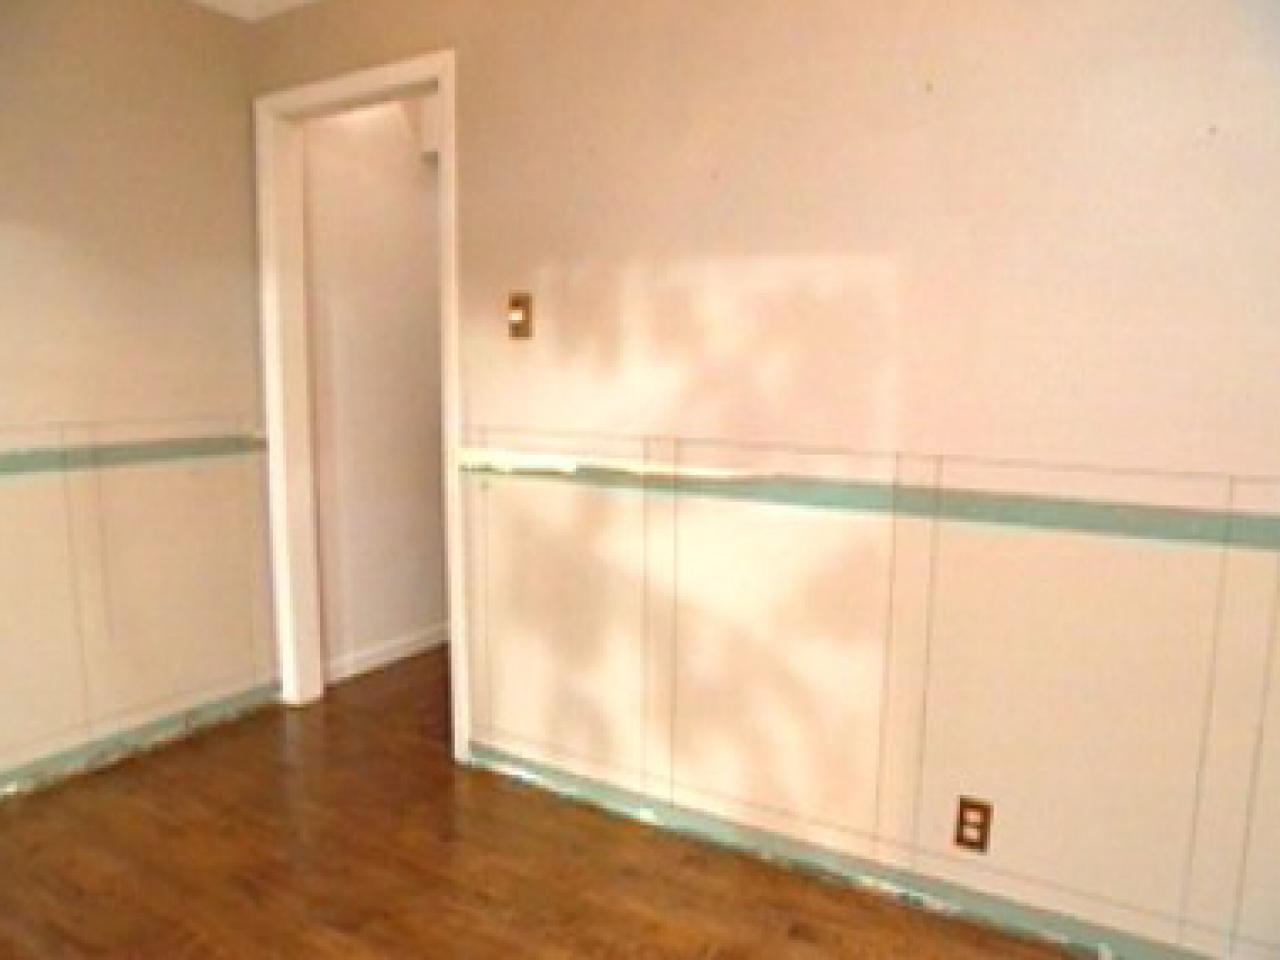
Wainscoting or bead board would be a beautiful look. A chair rail, also known as a dado rail, is a horizontal piece of trim that usually runs the perimeter of a room approx 36″ from the floor, but can also be awkwardly placed on a single wall (popular in the '90s). Cut off loose or torn paper with a utility knife. Consider complete panelling below the chair rail: It is not a dated look, this is just not executed well, especially considering the beautiful soffeted ceiling and the width of your crown moulding.
How To Install Custom Wainscoting In A Dining Room How Tos Diy from diy.sndimg.com Stair lifts are installed onto the stair treads, not the wall. Press the knife between the trim and the wall. That could actually be knocked down with a scraper, then sanded down even, without having to go with the mud job. Removing chair rail is a simple task requiring little skill and basic hand tools. Wainscoting or bead board would be a beautiful look. Rail together at the base of the stairway making assembly easy. The rental fee will usually include an installation and removal fee. I doubt that they would have any caulk buildup, unless the previous person that lived there, or installed that chair rail, or even the op applied it along the length of the rail, most likely just paint buildup.
I'm wondering if removing them will damage the wall and require repair.
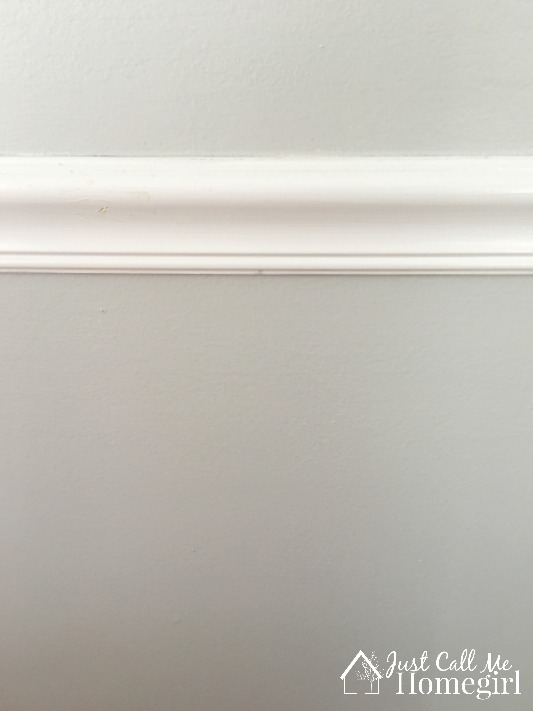
If you don't like that look, i would recommend removing the chair rail. Now, i'm not going to lie and tell you i can't see the chair rail at all or that this is a perfect solution. Use a utility knife to score along the edges of the trim. Slide the thin edge of the pry bar into the gap, using the putty knife as a shield to protect the wall. Remove your tape and enjoy your new chair rail free walls. The chair rail is weak. Fill a small spray bottle with distilled white vinegar and spray the vinegar into the opened seam to loosen the wood glue. Consider complete panelling below the chair rail: As mentioned earlier, the nails that did not come out with the chair rail when you pried it off can be removed by using a hammer or pliers. Bruno stair chair model 1550. Work on a small section of wood trim at a time and allow the vinegar to work for 15 minutes before continuing. If you don't like that look, i would recommend removing the chair rail. Slide the wide putty knife flat against the wall, starting at one end of the chair rail.
This step cuts the caulk and protects the walls from being torn. Press the knife between the trim and the wall. Slide the wide putty knife flat against the wall, starting at one end of the chair rail. Slide the wide putty knife flat against the wall, starting at one end of the chair rail. Get shopping advice from experts, friends and the community!
How To Remove A Chair Rail Just Call Me Homegirl from justcallmehomegirl.com Is a stair lift easily removed? Then using a sturdy putty knife get in behind the chair rail, and then using a screwdriver or, anything else to pry it off, put the screwdriver on the putty knife using that as a block. Tighten the 3 pinch bolts. This project is taking quite a bit longer than originally anticipated. Remove your tape and enjoy your new chair rail free walls. Wainscoting or bead board would be a beautiful look. Bruno stair chair model 1550. This step cuts the caulk and protects the walls from being torn.
Stair lifts are installed onto the stair treads, not the wall.
The dip in the middle does not matter (nor do the nail holes) as the joint compound will take care of that, it's all about making the surface uniformly flat. Wainscoting or bead board would be a beautiful look. Be careful in removing them so as not to damage the surface of the wall. This step cuts the caulk and protects the walls from being torn. Minor cracks can be filled in with joint compound, but a setting compound would be better. The chair rail is weak. Removing chair rail is a simple task requiring little skill and basic hand tools. You will also most likely have other things that need patching as well. Remove your tape and enjoy your new chair rail free walls. Stair lifts are installed onto the stair treads, not the wall. Now a new chair rail can be attached to your wall. 1 cut through the caulk by running the edge of the pry bar. You may need to work along the wall at first before you find a place where the knife will fit.